I have already purchased an 01' harness, and I was in line to get ChaseBays to "tuck it" etc. I'm glad that plan was put on hold, since now RyWire and ChaseBays are now offering brand new "tucked" harnesses for the same price and cheaper than the original price ChaseBays quoted me. Link *ChaseBays has pictures on the next page displaying his new brand new harness etc.andyjt wrote:Your doing a great job on it. I cant wait to see it done.. Do you plan on tucking the rest of the engine harness as well?
98-1040 Rebuild begins...Take II
-
coolhandluke
- 401R
- Posts: 2489
- Joined: December 12th, 2005, 2:36 pm
- Location: SC
- Contact:
Re: 98-1040 Rebuild begins...Take II
WTB: ODB1 VTEC Distributor!!!!!!!!!!!
2011 ITR Expo Calendar
http://www.itrca.com/forums/viewtopic.php?f=33&t=12472
2011 ITR Expo Calendar
http://www.itrca.com/forums/viewtopic.php?f=33&t=12472
Re: 98-1040 Rebuild begins...Take II
seen it and it looks HOT! can't wait for us to be twins!
-
coolhandluke
- 401R
- Posts: 2489
- Joined: December 12th, 2005, 2:36 pm
- Location: SC
- Contact:
Re: 98-1040 Rebuild begins...Take II
OMG a journey siting!journey85 wrote:seen it and it looks HOT! can't wait for us to be twins!
WTB: ODB1 VTEC Distributor!!!!!!!!!!!
2011 ITR Expo Calendar
http://www.itrca.com/forums/viewtopic.php?f=33&t=12472
2011 ITR Expo Calendar
http://www.itrca.com/forums/viewtopic.php?f=33&t=12472
-
00IntegraSoon2beR
- New ITRCA Member
- Posts: 13
- Joined: March 7th, 2008, 3:03 pm
Re: 98-1040 Rebuild begins...Take II
anymore updates and pictures?
-
coolhandluke
- 401R
- Posts: 2489
- Joined: December 12th, 2005, 2:36 pm
- Location: SC
- Contact:
Re: 98-1040 Rebuild begins...Take II
I worked on the car yesterday and will be updating the thread shortly with pictures.
WTB: ODB1 VTEC Distributor!!!!!!!!!!!
2011 ITR Expo Calendar
http://www.itrca.com/forums/viewtopic.php?f=33&t=12472
2011 ITR Expo Calendar
http://www.itrca.com/forums/viewtopic.php?f=33&t=12472
-
coolhandluke
- 401R
- Posts: 2489
- Joined: December 12th, 2005, 2:36 pm
- Location: SC
- Contact:
Re: 98-1040 Rebuild begins...Take II
Small update: 1/23/08
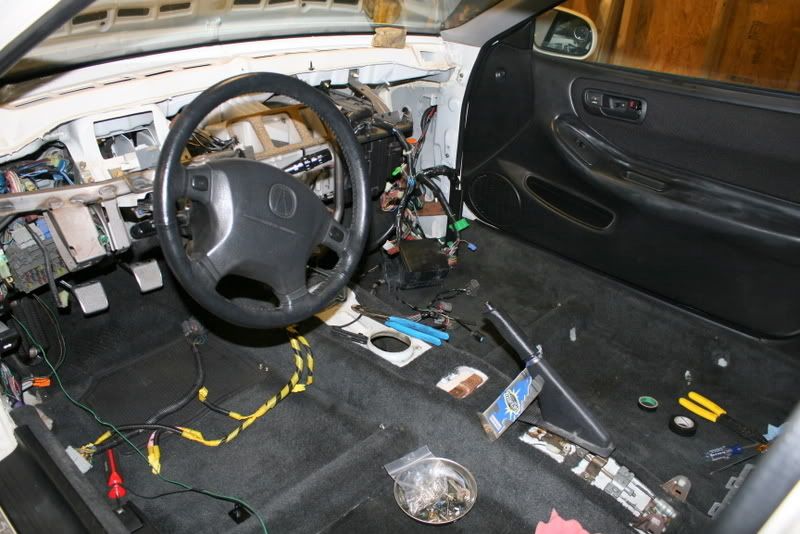
The interior looked like this when I started yesterday afternoon:
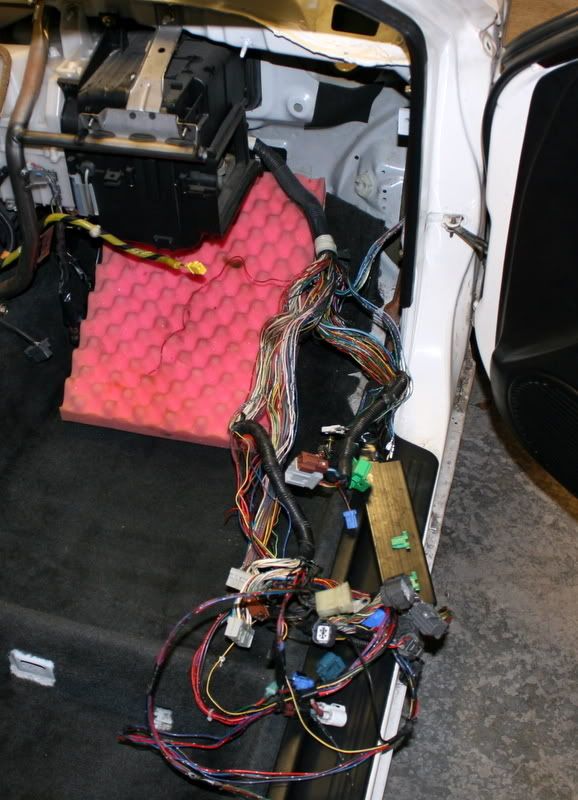
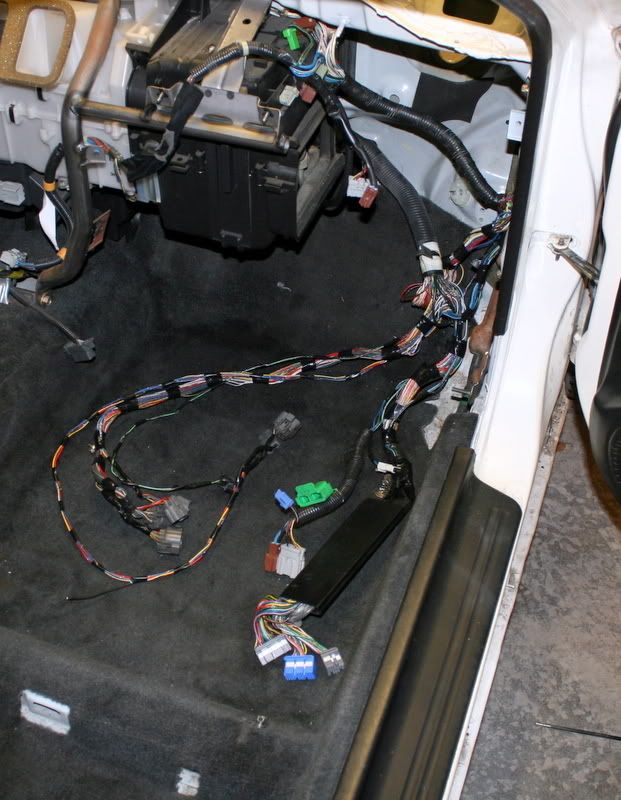
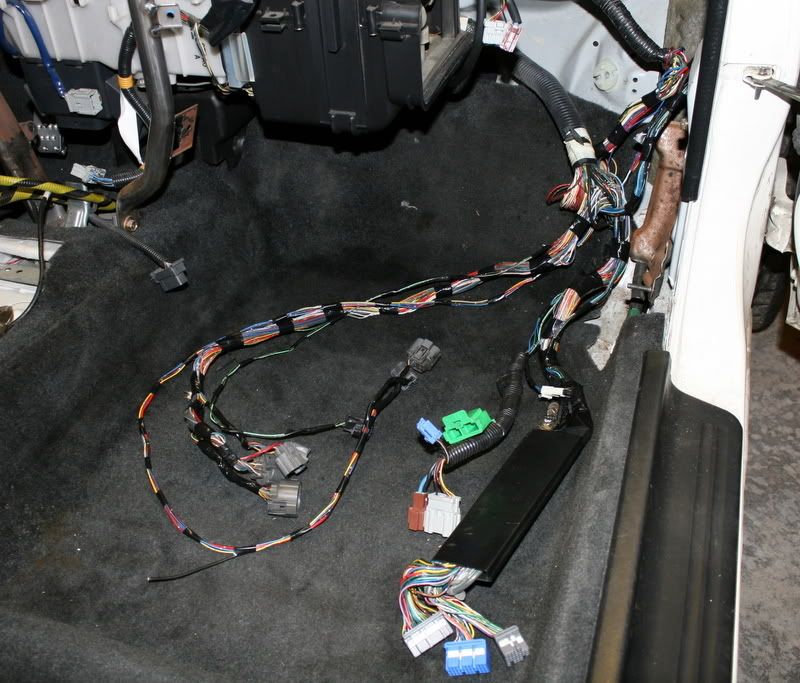
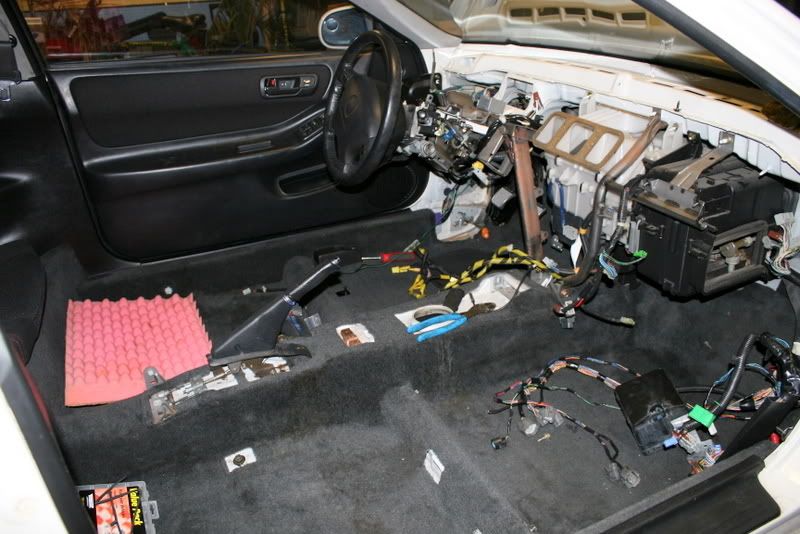
I spent some time separating wires and cleaning everything up:
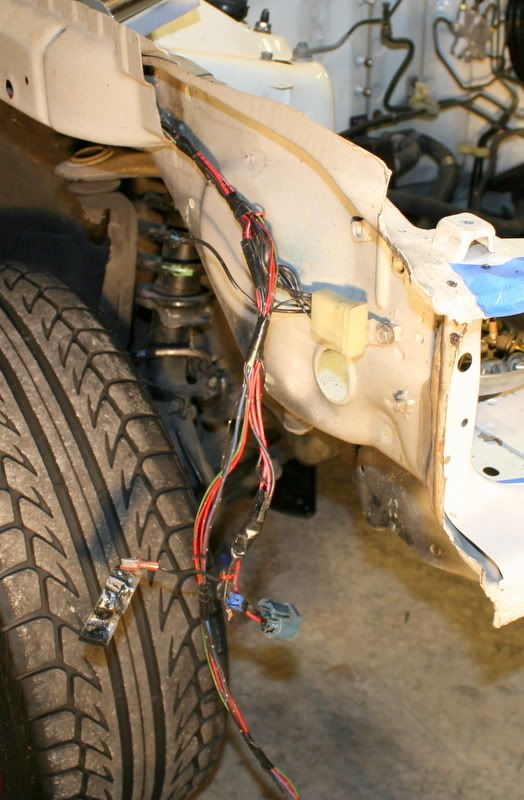
When finished, I ran the passenger headlight harness through the fender to finish mocking up the headlight wires:
The interior looked like this when I started yesterday afternoon:
I spent some time separating wires and cleaning everything up:
When finished, I ran the passenger headlight harness through the fender to finish mocking up the headlight wires:
WTB: ODB1 VTEC Distributor!!!!!!!!!!!
2011 ITR Expo Calendar
http://www.itrca.com/forums/viewtopic.php?f=33&t=12472
2011 ITR Expo Calendar
http://www.itrca.com/forums/viewtopic.php?f=33&t=12472
-
coolhandluke
- 401R
- Posts: 2489
- Joined: December 12th, 2005, 2:36 pm
- Location: SC
- Contact:
Re: 98-1040 Rebuild begins...Take II
Small Update:
Even though it is freezing outside, I found myself in the garage so I turned on the heater and did a little bit of work...
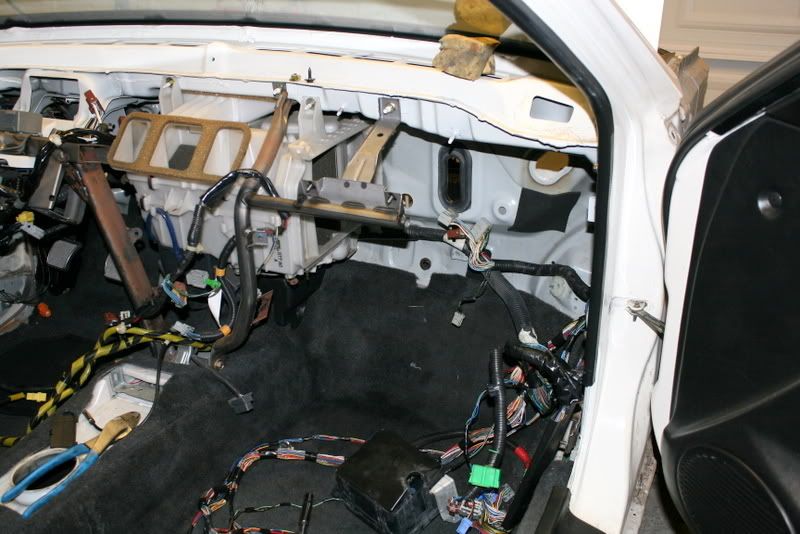
Here is the car before I picked up a single tool. I am trying to do better at documenting this process, so here is the car as I walked in the garage:
Todays work: Removing the AC EVAP, hose, connecting the wires to the fusebox, and semi mounting it in place...
Dropping the EVAP box...

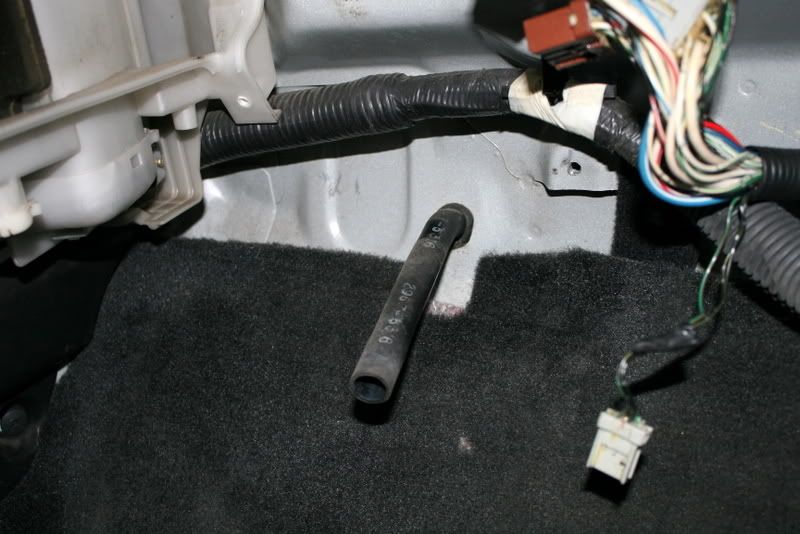
Disconnected the hose on the backside...
The EVAP removed...
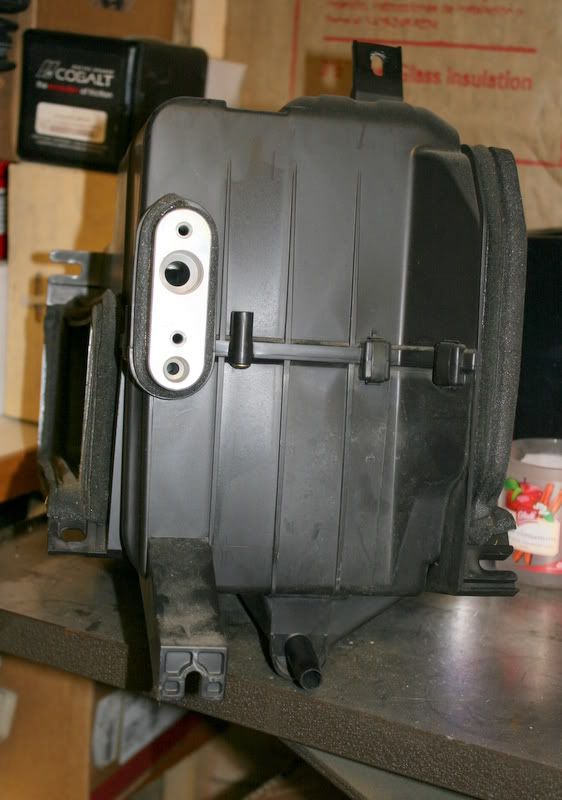
What it looks like after...
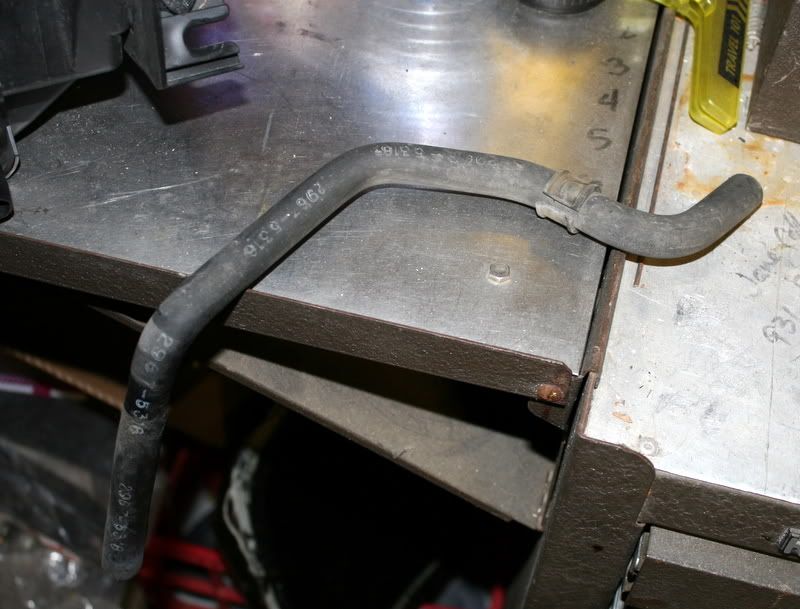
The disconnected hose from the engine bay...
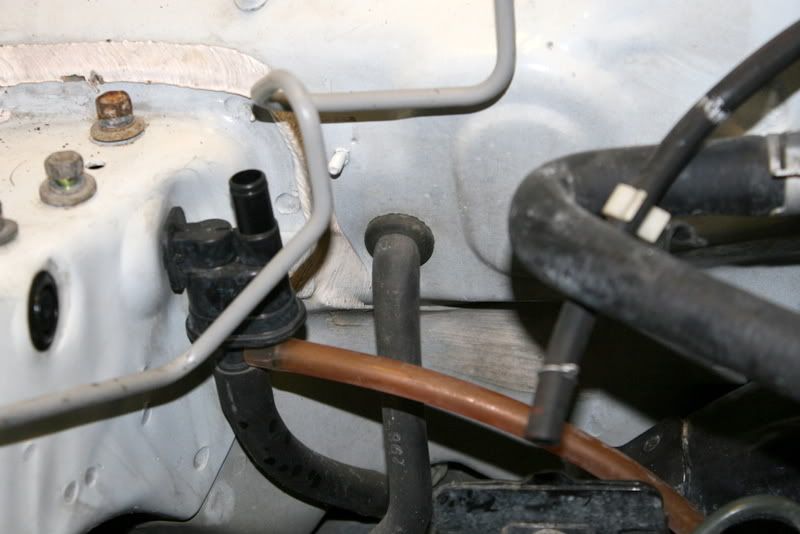
The hose removed:
Here is the spot I am considering for the fusebox:
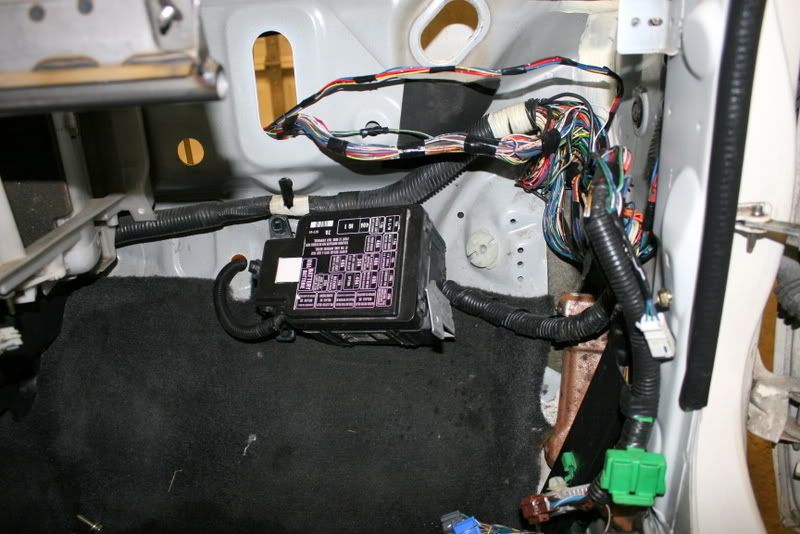
Any thoughts? =)
Even though it is freezing outside, I found myself in the garage so I turned on the heater and did a little bit of work...
Here is the car before I picked up a single tool. I am trying to do better at documenting this process, so here is the car as I walked in the garage:
Todays work: Removing the AC EVAP, hose, connecting the wires to the fusebox, and semi mounting it in place...
Dropping the EVAP box...
Disconnected the hose on the backside...
The EVAP removed...
What it looks like after...
The disconnected hose from the engine bay...
The hose removed:
Here is the spot I am considering for the fusebox:
Any thoughts? =)
Last edited by coolhandluke on April 2nd, 2009, 12:29 am, edited 1 time in total.
WTB: ODB1 VTEC Distributor!!!!!!!!!!!
2011 ITR Expo Calendar
http://www.itrca.com/forums/viewtopic.php?f=33&t=12472
2011 ITR Expo Calendar
http://www.itrca.com/forums/viewtopic.php?f=33&t=12472
-
coolhandluke
- 401R
- Posts: 2489
- Joined: December 12th, 2005, 2:36 pm
- Location: SC
- Contact:
Re: 98-1040 Rebuild begins...Take II
Some updates from this evening:
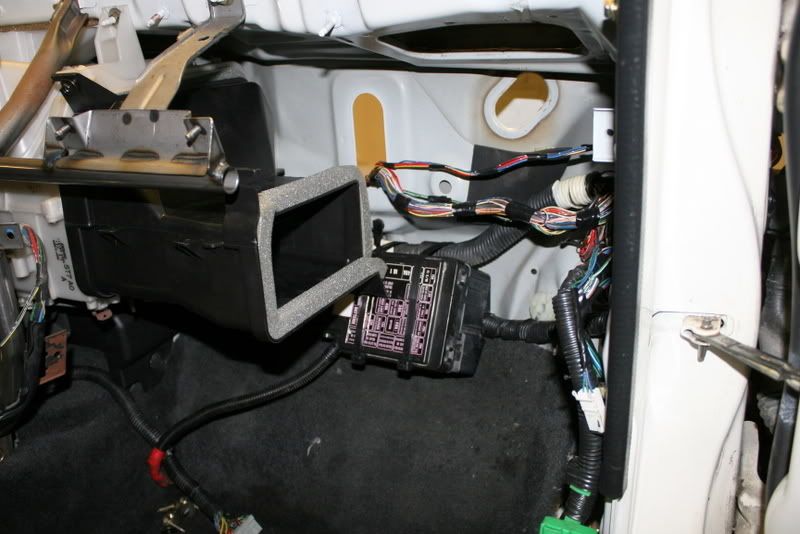
I got the AC delete duct in place, and mocked up the fusebox. For now it has industrial zip ties, I need to fab up a mount in the future:
I had cut the windshield wiper motor wires while tucking some wires. They have been routed into the cowl area through a hole in the body.

I got the wires ready for attachment and cur the heatshrink. I went ahead and put the heat shrink on and crimped one side of each wire.
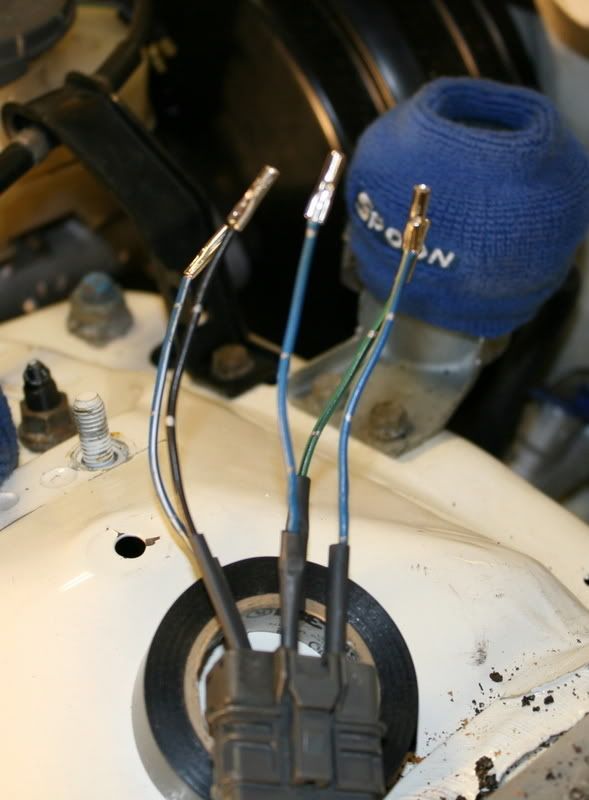
I then crimped the wires to their respective counterpart, pulled the heat shrink over, and then pulled out the heat gun to finish the job.
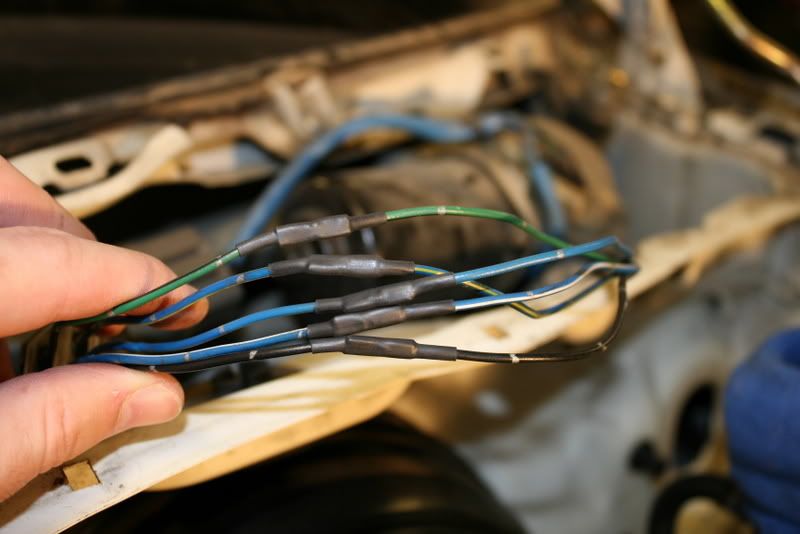
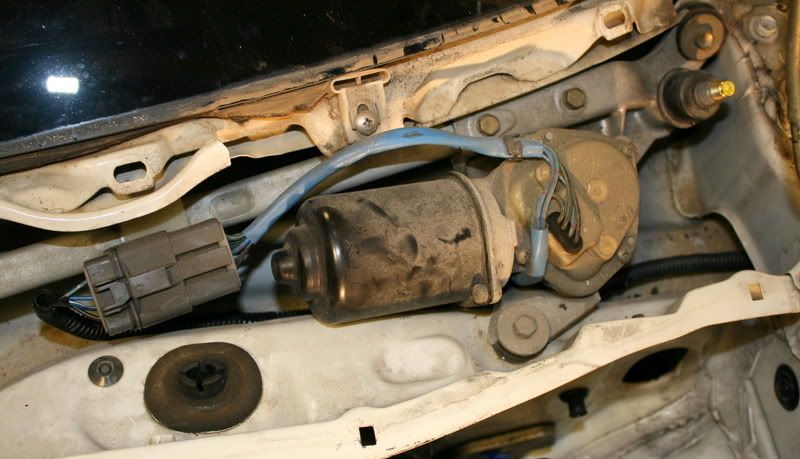
I then wrapped the entire length in electrical tape, loomed it, and taped the loom, and then ran the wires beneath the wiper motor. Here is the final product:
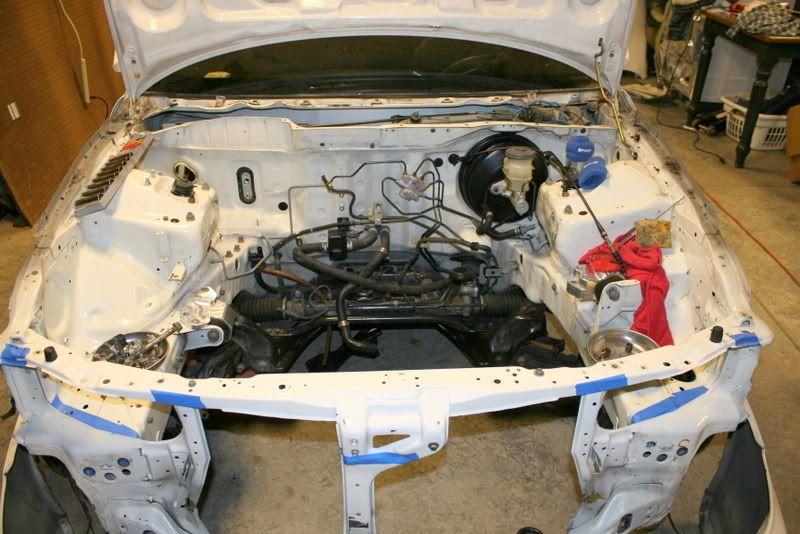
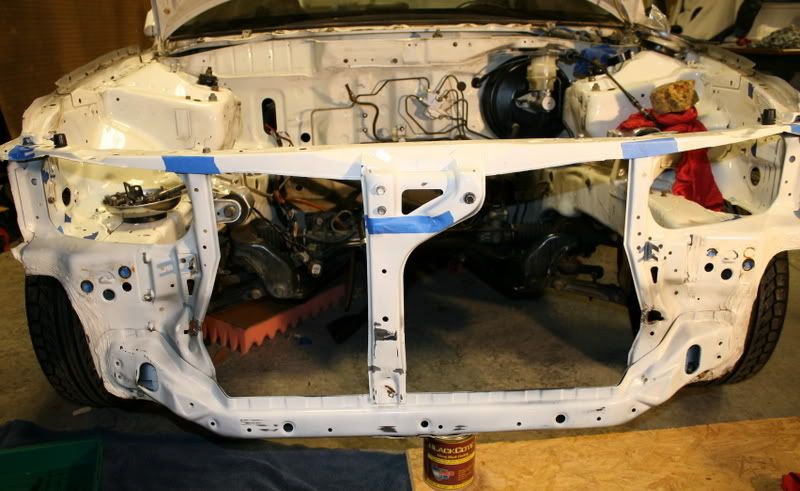
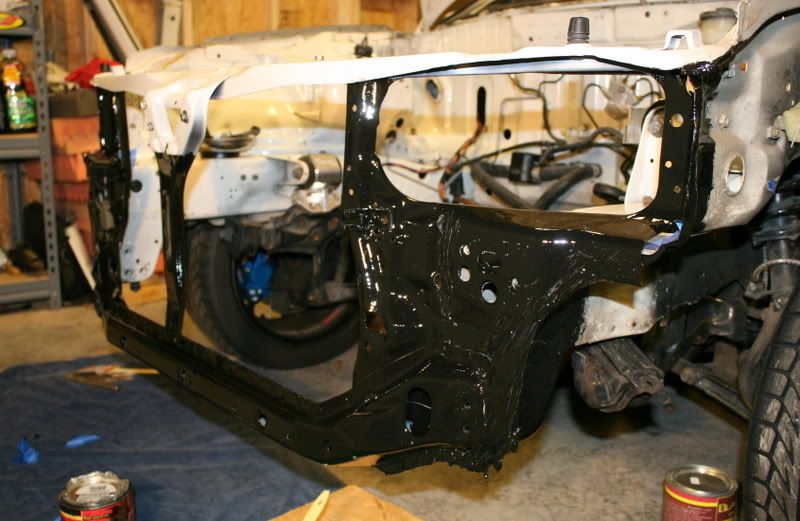
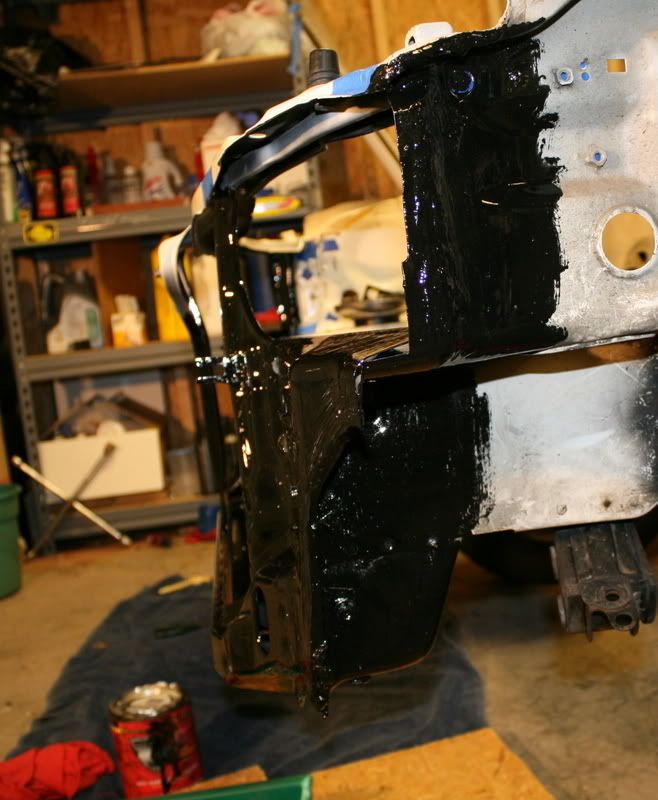
The weather was 58 degrees today, so I was finally able to apply the POR15 to my front end. Here is the front end before any paint:
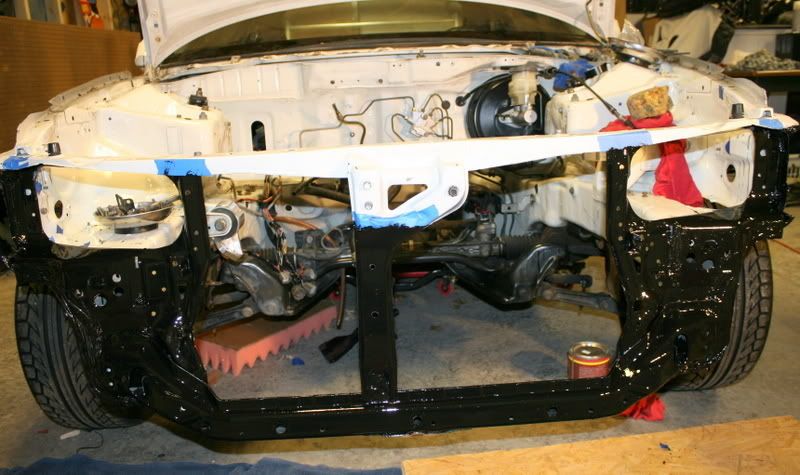
Here is the front end after the paint:
The front bumped had some serious paint flaking issues, along with its various imperfections. I can't complain at all, because the price was right and the bumper is completely functional. To make this paint last longer, I began sanding off the flakes. Here is the semi-final product:
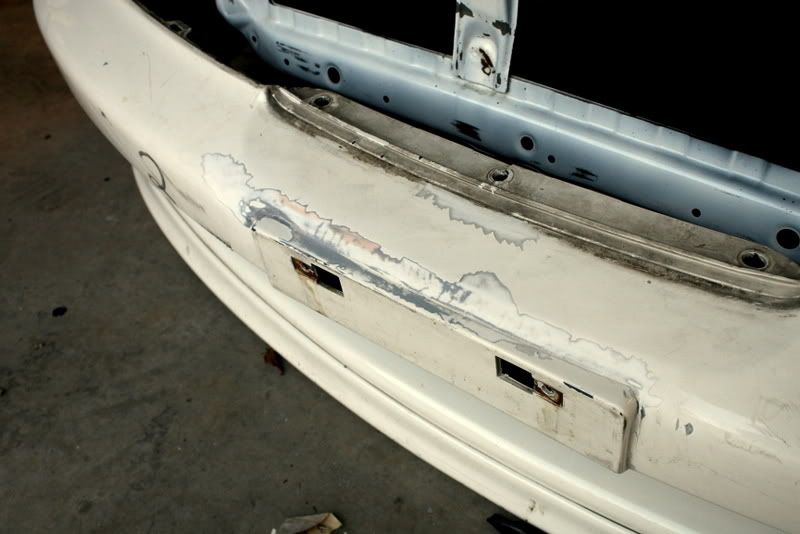
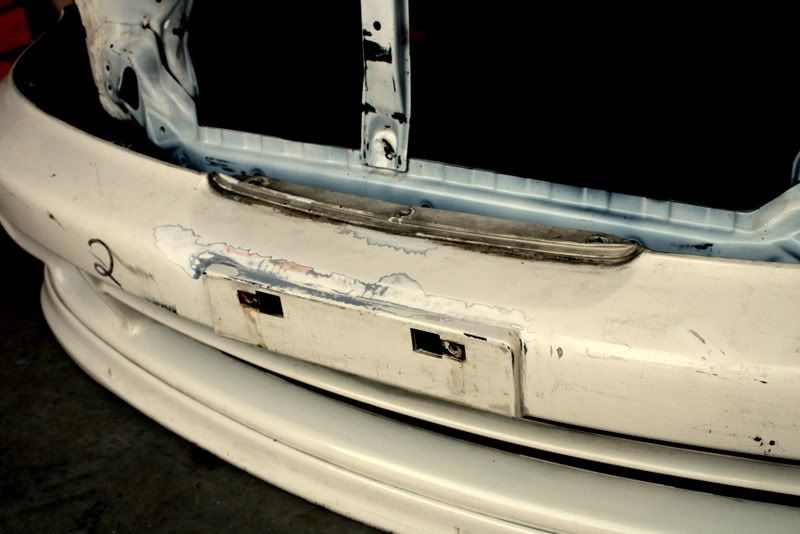
Later I will pickup some NH-0 in a can and prime the section and apply the paint. The car will be paint in a year or two, but I want to go as long as I can before shelling out that amount of cash.
I got the AC delete duct in place, and mocked up the fusebox. For now it has industrial zip ties, I need to fab up a mount in the future:
I had cut the windshield wiper motor wires while tucking some wires. They have been routed into the cowl area through a hole in the body.
I got the wires ready for attachment and cur the heatshrink. I went ahead and put the heat shrink on and crimped one side of each wire.
I then crimped the wires to their respective counterpart, pulled the heat shrink over, and then pulled out the heat gun to finish the job.
I then wrapped the entire length in electrical tape, loomed it, and taped the loom, and then ran the wires beneath the wiper motor. Here is the final product:
The weather was 58 degrees today, so I was finally able to apply the POR15 to my front end. Here is the front end before any paint:
Here is the front end after the paint:
The front bumped had some serious paint flaking issues, along with its various imperfections. I can't complain at all, because the price was right and the bumper is completely functional. To make this paint last longer, I began sanding off the flakes. Here is the semi-final product:
Later I will pickup some NH-0 in a can and prime the section and apply the paint. The car will be paint in a year or two, but I want to go as long as I can before shelling out that amount of cash.
WTB: ODB1 VTEC Distributor!!!!!!!!!!!
2011 ITR Expo Calendar
http://www.itrca.com/forums/viewtopic.php?f=33&t=12472
2011 ITR Expo Calendar
http://www.itrca.com/forums/viewtopic.php?f=33&t=12472